
I will post as I find out what ranking they are on expore: I am note sure. Scout is confusing. Not sure if it is descrepencies or what:
http://bighugelabs.com/flickr/dna.php?username=21126721@N07
Look under Explore! Right now I have 21 photos on there;-)
Showing posts with label Digital Photos. Show all posts
Showing posts with label Digital Photos. Show all posts
Tuesday, November 4, 2008


Monday, September 15, 2008
Bench Set
http://www.flickr.com/photos/hustonphotos/sets/72157607268232590/
Check out my Bench Set on Flickr! I used RyeDynamix HDR for the effects in these pictures!
This is how I came up with this set!
I was sitting at Abilene Regional Hospital visiting my mom who was very ill, I was looking at the benches at the pond located in front, and I could not help but think about all the lives that pass through this hospital. I was inspired to do this set. Think about all the people who sat on these benches visiting loved ones in the hospital. Some Made it and some didn't. I thought about it and felt a chill. That is what this set is about.
Check out my Bench Set on Flickr! I used RyeDynamix HDR for the effects in these pictures!
This is how I came up with this set!
I was sitting at Abilene Regional Hospital visiting my mom who was very ill, I was looking at the benches at the pond located in front, and I could not help but think about all the lives that pass through this hospital. I was inspired to do this set. Think about all the people who sat on these benches visiting loved ones in the hospital. Some Made it and some didn't. I thought about it and felt a chill. That is what this set is about.
Wednesday, July 30, 2008
Sick
I have been sick lately! I am supposed to see a specialist 07 of Aug! I will try to update this but may not be able to as often! Might have to have a Tonsillectomy;-(
Thursday, March 6, 2008
Special Effects
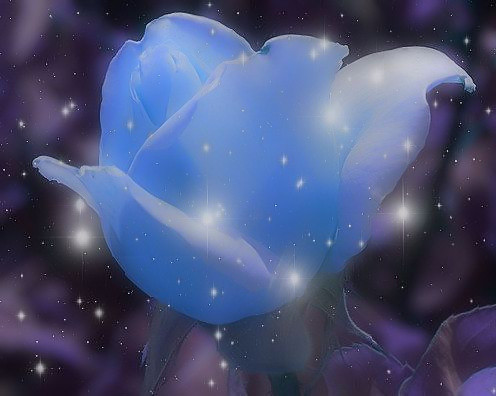
I created a mystical picture thatnks to www.FlauntR.com. FlauntR is a great online photo-editing website that has som great effects. I also use www.picnik.com! Picnik is also good for some photo-editing effects as well.
MONTEREY BAY

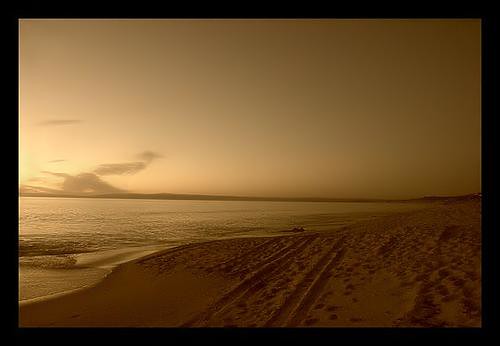
Here is the same photo of Monterey Bay CA! One is in sepia and the other is just a crop with a color enhancement! Monterey is another beautiful place in CA to visit! I really enjoyed it! The beaches ar wonderful and the food is great! The town seems historic almost. It makes a great vacation!
Wednesday, March 5, 2008
SILHOUETTE
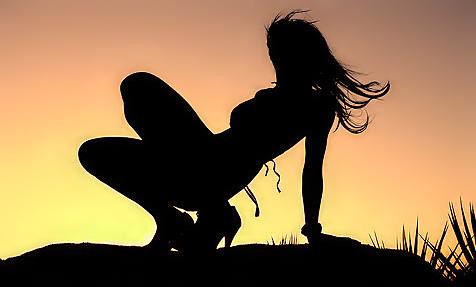
Every Photographer has a silhouet shot! Here is mine! This was of a model named Anicia! It was taken down at Indian Cove down the road from Twentynine Palms! It was taken about sunset time but I still had some photo-editing to do! I like how it cam out just the same! I was pleased and so was she! I shot it on a TFP basis!
Cheese Ball
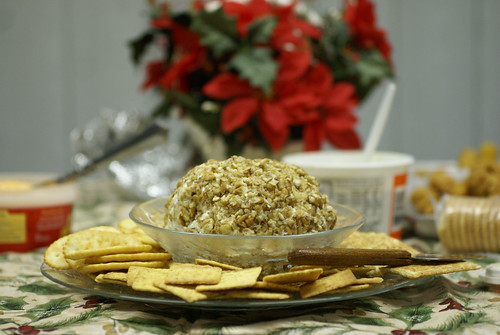
This is one of my favorite foods! I love Cheese Balls! I also have the recipe here
http://memyselfandi79.blogspot.com/2008/02/one-of-best-recipes-cheese-ball.html!
This is my other blog regarding stuff about myself!
GLUTTONY (PART OF THE 7 DEADLY SINS SERIES)
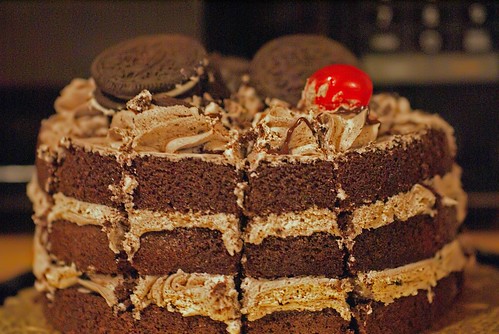
I had so many sweets in TEXAS. This looked too good to pass up. Yummy! The best food is always on holidays! This is what I call a chocolate fix with a cherry on top. It tasted just as good as it looked too.
Gluttony is the over-indulgence and over-consumption of food, drink, or intoxicants to the point of waste. A misplaced desire of food or its withholding from the needy.
Depending on the culture, it can be seen as either a vice or a sign of status. The relative affluence of the society can affect this view both ways. A wealthy group might take pride in the security of having enough food to eat to show it off, but it could also result in a moral backlash when confronted with the reality of those less fortunate.
5 ways to commit gluttony:
* Praepropere - eating too soon
* Laute - eating too expensively
* Nimis - eating too much
* Ardenter - eating too eagerly
* Studiose - eating too daintily
What describes gluttony better than chocolate! In this case I am guilty!
Gluttony is one of the 7 deadly sins!
PAIR-A-DICE TATOOZ & BODY PIERCING STUDIO

This is a collage of pictures I took of their business cards. Pair-A-Dice has a wonderful tattoo shop. In fact if you are located near Twentynine Palms and you were thinking of getting a tattoo I would recommend this Place.
This place is also just beautiful! Dan has some wonderful art going on at this place. It looks and feel just like Pair-A-Dice. It is a great place filled with great people and their tattoos speak for themselves!
Tuesday, February 26, 2008
Photos with a deeper meaning!
Lately I have been working on making my photos more artistic instaed of the standard flower macro of HDR landscape! I want to create visual statements with my photos. I want to create pictures with a deapper meaning or even a message! I want to make my pictures more interesting. This is going to be a challenge for me but I love challenges! I am always open for tips and ideas so if anyone has any , please share!
Monday, February 25, 2008
Monterey Vaction - Bridge Beyond Beauty

This was another picture taken on our way back from our Monterey Vacation! This was one of my faves. I used the Dynamic-HDR tool for this effect.
It is important to be careful with HDR because you can get a cartoon effect if you go to far. In some of my first attemps you see that.
I enjoy waterscapes and this was one of a few I have taken!
Moments Captured In Time - My Flickr Name
Tuesday, February 12, 2008



Wednesday, January 23, 2008
HDR METHOD
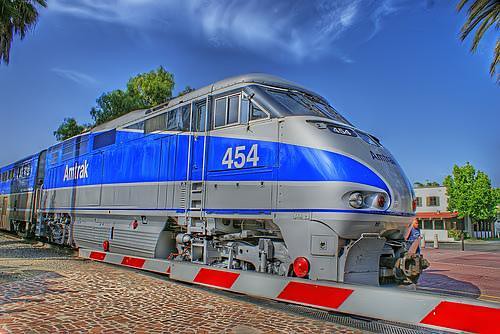 I took this picture in San Juan Capistrano. I took it right outside the mission! Then I used the HDR Method to make it look like this;-)
I used Photomatix! At the time I had Adobe CS2!
What is HDRI?
HDRI means High Dynamic Range Imaging. HDRI is today often used in 3D light rendering and also video post-production. Since Photoshop CS2 supports 32 bit HDR image formats also photographers start to experiment with HDRI. We do not plan to give an in depth explanation of HDRI but rather talk about the basics and show how HDRI can be used for artistic images today.
So what is HDR (High Dynamic Range)?
The dynamic range defines the contrast ratio the eyes can see, the cameras can capture or a print on paper can show. Best we state some numbers (mainly taken from here):
100,000:1 A scene showing the interior of a room with a sunlit view outside the window
1000:1 can be captured by some digital cameras (may even be optimistic if we recognize that the dynamic range is limited by noise)
256:1 Print on glossy paper with a dmax of about 2.4
50:1 Print on matte paper with a dmax of 1.6
Let's think of high dynamic range starting beyond 1000:1 (means beyond what any printer and even most digital cameras can produce).
What is the relation between bit depth and HDR?
If you have an image with high bit depth this does not mean that you automatically have also a
HDR image. Otherwise you would take low DR images and just convert them to a higher bit depth. But on the other side the bit depth limits how much DR you can represent in the data:
8 bit: 256:1 (clearly not a format usable for HDR)
16 bit: 65,000:1 or 32,000:1 (as we understand Photoshop is only using 15 bit internally)
32 bit: Here floating point numbers are used and for our practical purpose there in no real limit
How can we capture HDR images?
Right now most digital cameras capture only a maximum of 1,000:1 (as said this even maybe optimistic). While there are many developments to create sensors that can capture a higher dynamic range (e.g. Fuji in the S3) the main method today is to combine multiple exposures (2 - 10). As always this creates its own problems:
Moving objects (results in so called "ghosting")
Camera move (requires image alignment)
In case of stationary objects and a sturdy tripod quite good HDR images can be created.
Why creating HDR images when prints cannot reproduce the contrast?
Once you have created a HDR image you need to find a method to compress the high dynamic range in a way that it fits into the range of a print. This procedure is called Tone Mapping.
Tone Mapping
Tone Mapping is a way to reduce a high contrast image to a much lower contrast one. It always will be some sort of compromise. That is why there are many different algorithms for Tone Mapping and it is very much dependent on the concrete image how good some of these methods will work.
Photomatix by MultimediaPhoto is on the market for some time. We played with it also in the past but never got really excited for our own artistic work. This changed recently. We are not sure whether this is related to the new version 2.3 or a better understanding in how to use the software (likely both). The following will give an idea how we use Photomatix and is not a kind of manual.
Creating a HDR image in Photomatix
There are quite a few ways to create a HDR image in Photomatix. Normally you should have at least 3 exposures with about 2 f-stops difference (-2, 0, +2 should often work fine). Most of the time you convert the RAW files in your RAW converter of choice (make sure you have the same white balance for all shots) and later combine them in Photomatix. But there is also a way to start directly from the RAW files in Photomatix.
We use in our sample a three exposure sequence (Canon 1Ds, 4, 8, 20 seconds). The image(s) we use were photographed at Fort Point in San Francisco. The scene is really dark and it is quite a challenge not to overexpose the window. We may have gotten a decent result from one single image in the sequence but we would have a hard time to create the final look like in Photomatix.
We create the HDR file using the Automate->Batch feature:
In batch you can automatically process multiple sets of RAW files and create HDR images (even ready tone mapped TIFFs or JPEGs). In our case we only created one single HDR file. Once the HDR file is generated we open the resulting HDR file.
Looks ugly, right? What is gone wrong? Fortunately there is nothing wrong here. Without Tone Mapping a HDR image cannot show on screen properly because it can have a dynamic range way beyond the screen capabilities. Also an automatic Tone Mapping does not make sense because there is no single and even less automatic way to tone map an image.
Because we want to print the final image we need to process the HDR file in the Photomatix Tone Mapping dialog.
Note: We have reviewed before the Photomatix Photoshop Tone Mapping plugin. But we actually did not use the plugin for HDR files. This was not really tone mapping but should be called tone re-mapping. Nevertheless it is an effective way to improve images.
Photomatix provides today two different tone mapping methods:
Detail Enhancer
Tone Compressor
Both can be useful for certain types of images. For our image we want to get a certain gritty look and here the "Detail Enhancer" at 100% Strength is very useful.
Notes of caution using the "Detail Enhancer" method:
Some images may show halos at high contrast edges
The preview is not always 100% correct (but good enough for practical purposes)
Once the image is processed we save it as a TIFF file.
Thursday, December 27, 2007
Orton Effect - Tutorial
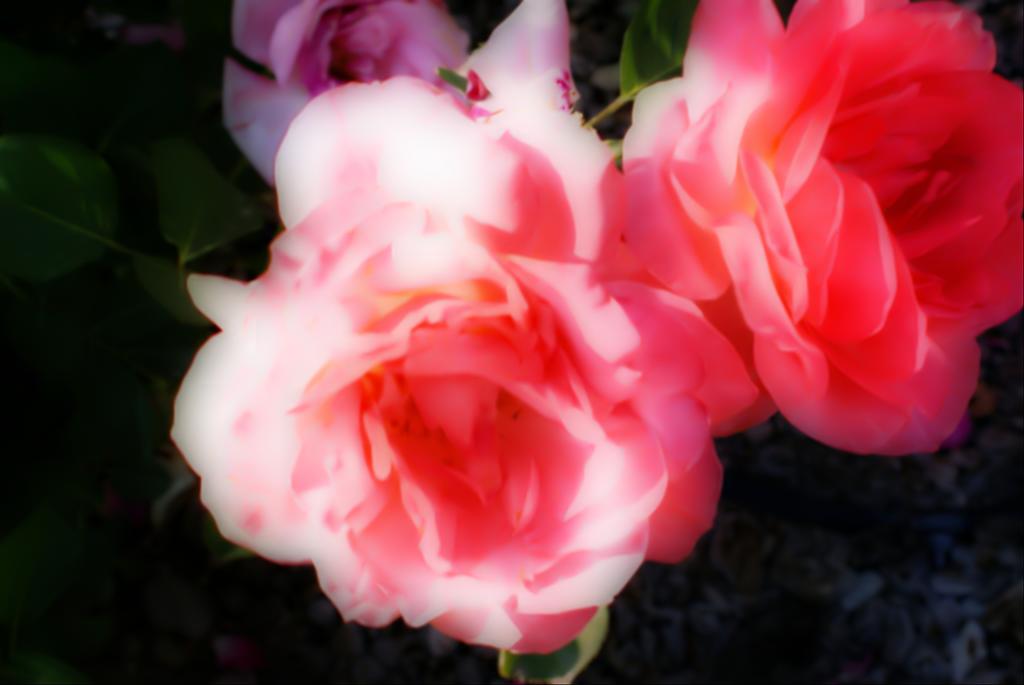
The Orton Effect is named after Michael Orton who first used the technique is a sandwich of two images, one in focus the other out of focus. Freeman Patterson and Andre Gallant have both used the technique successfully in their work as well.
I use Adobe CS3 when I photoshop images! It is one of the best photoshops in my opinion!
1. Open your image. (Image 1)
2. Duplicate the background layer (Right click on the background layer and choose duplicate) and name that layer Sharp.
3. Create another duplicate of the background layer.
4. Change the Blending mode of the Sharp Copy to screen.
5. With the Sharp Copy layer selected, right click and choose Merge Down. (Image 2)
6. Right click on the Sharp layer, choose Duplicate and name this layer Out of Focus.
7. On the Filter Menu, choose Blur - Gaussian Blur (Image 3)Depending on the resolution of the image you are using, the amount of blur needed will change. Use enough that the shapes are still visible, but detail is not. For this 6.1 Mega pixel image, a value of 15.9 was sufficient.
8. Change the blending mode of the Out Of Focus layer to Multiply. (Image 4)
Once you are complete, you may find it necessary to adjust the opacity of your Out of Focus layer and/or apply a levels (or curves) adjustment layer to the Sharp layer if some tweaking is necessary.You can also adjust the amount of blur you apply to the out of focus image, as well as adjustments such as level, brightness and contrast and it is good practice to apply sharpening to your image Sharp layer. (Image 5)
Not all images work well with this effect! You have to decide what looks good when it comes to your own photos and what you like. The current image looked blurry before I used the Orton effect and now it looks nice. Almost like I meant for it to look some what soft and blurry! I think this effect works wonderfully with flowers in my opinion.
Please let me know how you're images turn out using this effect or if you have a different effect you would like to share then please let me know! It is nice when photographers can learn together!
Subscribe to:
Posts (Atom)


